GatsbyのLinter/Formatter, CSS-in-JS環境構築
この記事では静的サイトジェネレーター(SSG)で有名なGatsbyのインストール方法、Gatsby starterを使ったプロジェクトの作り方、Linter(ESLint, stylelint)/Formatter(prettier)の設定方法、CSS-in-JS(styled-components, Emotion)、tailwindの設定方法を説明します。
記事を読むよりも、とにかくGatsby環境が欲しいという方はnvm, Node.js, Gatsby CLIのインストールまでの作業を終わらせた後、gatsby new hogeでプロジェクトを作るか、Gatsby starterを使って構築からstyled-componentsやEmotion付きの環境を作れます。
nvm, Node.js, Gatsby CLIのインストール
まずは、nvm, Node.js, Gatsby CLIの3つをインストールします。
nvm(Node.jsバージョンマネージャー)をインストール
nvmはNode.jsのバージョンマネージャーです。nvmで異なるバージョンのNode.jsをインストールして、バージョンを切り替えて使えます。
Ubuntu等でaptを使ってインストールすると古いバージョンのNode.jsをインストールされてしまいますが、nvmを使えば最新版やLTS版を指定してインストールできます。
既にNode.js環境がある場合はこの手順は不要ですので、Gatsby CLIまで飛ばしてください。
インストールするには下のコマンドを実行してください
wget -qO- https://raw.githubusercontent.com/nvm-sh/nvm/v0.36.0/install.sh | bash
さらに下のコマンドを実行して、nvmのパスを通してください。
export NVM_DIR="$([ -z "${XDG_CONFIG_HOME-}" ] && printf %s "${HOME}/.nvm" || printf %s "${XDG_CONFIG_HOME}/nvm")"
[ -s "$NVM_DIR/nvm.sh" ] && \. "$NVM_DIR/nvm.sh"
上手くインストールされていれば、下記コマンドでバージョンの確認ができます。
nvm --version
0.36.0
Node.jsのインストール
nvmを使ってLTS版のNode.jsをインストールします。下のコマンドを実行してください。
nvm install --lts
上手くインストールされればnvm listを使ってインストールされたNode.jsの一覧を取得できます。
nvm list
       v12.16.2
       v12.16.3
->     v12.18.2
       v13.13.0
         system
Gatsby CLIのインストール
下のコマンドでGatsby CLIをインストールします。
npm install -g gatsby-cli
インストール完了後、下のコマンドでバージョン確認ができます。
gatsby --version
Gatsby CLI version: 2.12.102
Gatsby CLIでプロジェクトの作成
ここからはGatsby CLIを使ってプロジェクトを作成します。
Gatsbyプロジェクトを新規に作成する場合
Gatsbyのプロジェクトを新規に作る場合は以下のコマンドを実行します。
gatsby new gatsby-site
これで./gatsby-siteにGatsbyのプロジェクトが作成されました。
GatsbyにはstarterというBoilerplateを作る機能があります。これを使うと、環境設定や他のJavaScriptライブラリ、コンポーネントなどを全てまとめて管理できます。
特定のstarterを使ってプロジェクトを作るには、下のようにstarterプロジェクトのリポジトリのURLを指定してgatsby newします。
gatsby new hello-world https://github.com/gatsbyjs/gatsby-starter-hello-world
公式ページからGatsby starterを検索できます。
https://www.gatsbyjs.org/starters/?v=2
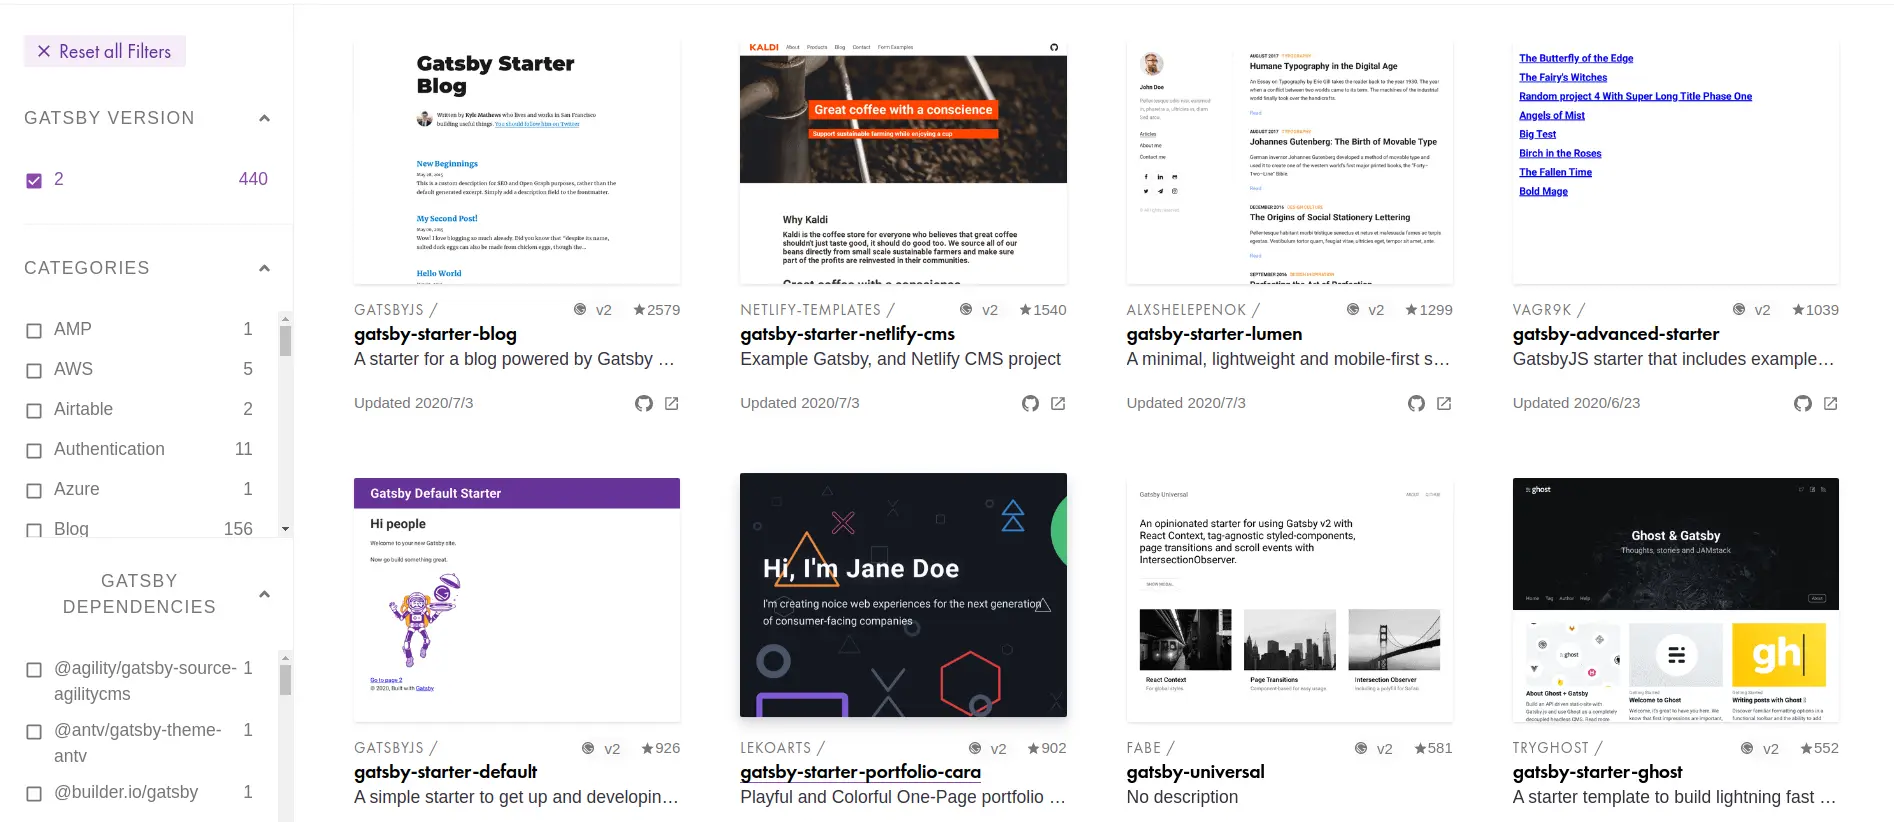
MDX(MarkdownとJSXを組み合わせたファイル)やWordPressなどのCMS向けのものなど、様々なstarterプロジェクトがあります。
プロジェクトが出来たら、gatsby developをしてサイトをローカルホストしてみましょう。
cd gatsby-site
gatsby develop
http://localhost:8000/でローカルホストされたサイトを確認できます。またhttp://localhost:8000/___graphqlでDataを取得するためのGraphQLをGUIで確認できます。
gatsby developはプロジェクトファイルを監視しているので、ファイルの変更があれば自動的にrebuildして変更をローカルホストされたサイトに自動的に反映します。
ただし、gatsby developは静的サイトを生成していないので、このままではパフォーマンスが悪く本番環境では使えません。SSGを実行するにはgatsby buildを使います。
gatsby build
このコマンドでSSGが実行されます。ビルドしたサイトをローカルホストするにはgatsby serveを使います。http://localhost:9000/でサイトを確認できます。
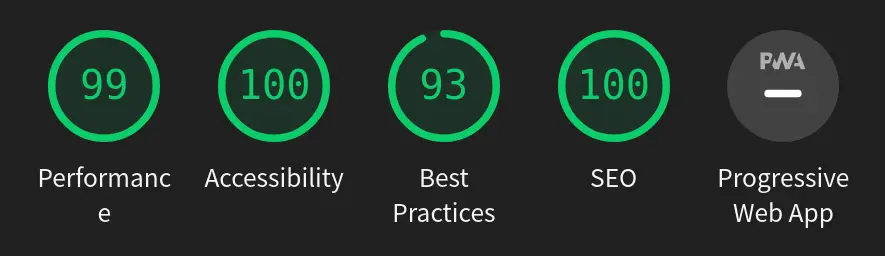
ここで本番環境のためのパフォーマンスの確認などを行います。試しにLighthouseを実行すると以下のようにハイパフォーマンスな結果が得られます。
既存のプロジェクトにGatsbyを追加する場合
Node.js,npm等を使っている既存のプロジェクトにGatsbyを追加する方法を説明します。
まず以下のコマンドで既存のリポジトリのpackage.jsonにgatsby,react,react-domを追加します。
npm install --save gatsby react react-dom
Gatsbyは./src/pages/index.jsをルートのページファイルとして認識するので、そのためのディレクトリとファイルを下のコマンドで作成します。
mkdir -p ./src/components ./src/pages
touch ./src/pages/index.js
index.jsを編集して、適当なコンポーネントを作成します。
// src/pages/index.js
import React from "react"

export default () => <h1>Hello Gatsby!</h1>
最後にgatsby developを実行して問題なければ成功です。
https://www.gatsbyjs.org/docs/setting-up-gatsby-without-gatsby-new/
あとは適宜、必要なプラグインやLinter/Formatterを追加していけば問題ありません。強いて言えば、.gitignoreファイルは公式のスターターを見ながらマージした方が良いです。特にcreate-react-appからGatsbyにした場合、publicフォルダの扱いが異なるので注意してください。
https://github.com/gatsbyjs/gatsby-starter-hello-world/blob/master/.gitignore
Gatsby向けのLinter(ESLint)/Formatter(Prettier)の設定
ここからはGatsbyにESLintやstylelint, PrettierなどのLinter/Formatterを設定する方法について説明します。
Gatsby向けにESLintを設定する
まずは何はともあれESLintをインストールします。
npm install eslint eslint-loader --save-dev
さらにeslint-config-react-appをインストールして、create-react-appで適応されているESLintのルールを適用できるようにします。
npm install --save-dev eslint-config-react-app
https://www.npmjs.com/package/eslint-config-react-app
touch .eslintrc.jsなどで.eslintrc.jsを作成します。中身は下のようにします。
module.exports = {
  globals: {
    __PATH_PREFIX__: true,
  },
  extends: react-app,
}
さらにgatsby-plugin-eslintをインストールします。gatsby-plugin-eslintを入れると、ESLintがデフォルトで.js,.jsxファイルをLintするようになり、node_modulesや.cache,publicといったファイルをLintの対象から除外します。
npm install --save-dev gatsby-plugin-eslint
gatsby-config.jsにプラグインの設定を書きます。
// gatsby-config.js

module.exports = {
  plugins: [
    'gatsby-plugin-eslint'
  ]
}
このままだと.eslintrc.jsで[eslint] Parsing error: Unexpected character [Error]が出てしまいます。
下のコマンドでbabel-eslint,eslint-plugin-react関連のプラグインを導入します。
npm install --save-dev babel-eslint eslint-plugin-import eslint-plugin-react eslint-plugin-jsx-a11y eslint-plugin-react-hooks
最終的に.eslintrc.jsは以下のようになります。
module.exports = {
  parser: "babel-eslint",
  rules: {
    strict: 0,
    "react/self-closing-comp": [
      "error",
      {
        component: true,
        html: true,
      },
    ],
  },
  globals: {
    __PATH_PREFIX__: true,
  },
  extends: [
    "eslint:recommended",
    "plugin:react/recommended",
    "react-app",
    "plugin:jsx-a11y/recommended",
  ],
  plugins: ["jsx-a11y"],
}
react/self-closing-compをつけておくと、<Image></Image>のように子要素の無いコンポーネントを<Image />のように自己終了タグに自動で置き換えてくれます。Emmetを使ってタグを書く時に非常に便利なのでオススメです。詳しくはeslint-plugin-reactのページをご覧ください。
https://www.gatsbyjs.org/docs/eslint/
https://www.gatsbyjs.org/packages/gatsby-plugin-eslint/
https://github.com/yannickcr/eslint-plugin-react
Gatsby向けにPrettierを設定する
GatsbyはデフォルトのスターターにPrettierが設定されているので、デフォルトの設定で問題なければ、特に追加するものはありません。
既存のリポジトリにGatsbyを追加した場合は以下の設定を参考にしてください。
まずは以下のコマンドでPrettierをインストールします。
npm install --save-dev --save-exact prettier
.prettierrcはデフォルトでは以下のようになっています。
{
  "arrowParens": "avoid",
  "semi": false
}
.cacheやpublicを除外するため、デフォルトの.prettierignoreは次にようになっています。
.cache
package.json
package-lock.json
public
CSS-in-JS(styled-components, Emotion)の設定
Gatsbyでstyled-componentsやEmotionといったCSS-in-JSを使うための設定をします。
Gatsbyでstyled-componentsを使うための設定
まずはstyled-componentsとそのためのプラグインをインストールします。
npm install --save gatsby-plugin-styled-components styled-components babel-plugin-styled-components
gatsby-config.jsにプラグインを設定します。
module.exports = {
  plugins: [gatsby-plugin-styled-components],
}
gatsby developを実行して設定に問題が無いか確認してください。
使い方は通常のstyled-componentsと変わりありません。以下のようにしてstyled-componentsをimportして、スタイルを当てるだけです。例えば./src/components/Button.jsを次のように作ります。
// ./src/components/Button.js
import styled from "styled-components"

const Button = styled.button`
  padding: 4px 16px;
  margin: 8px;
  color: black;
  background-color: lightgreen;
  border-radius: 8px;
`

export default Button
そして./src/pages/index.jsでButton.jsを呼び出します。
// ./src/pages/index.js
import React from "react"
import { Link } from "gatsby"
import Layout from "../components/layout"
import Image from "../components/image"
import SEO from "../components/seo"
import Button from "../components/Button"
const IndexPage = () => (
<Layout>
<SEO title="Home" />
<h1>Hi people</h1>
<p>Welcome to your new Gatsby site.</p>
<p>Now go build something great.</p>
<div style={{ maxWidth: "300px", marginBottom: "1.45rem" }}>
<Image />
</div>
<Button>hoge</Button>
<Link to="/page-2/">Go to page 2</Link>
<Link to="/using-typescript/">Go to "Using TypeScript"</Link>
</Layout>
)
export default IndexPage
下のようなボタンが表示されれば成功です。
Gatsbyのstyled-componentsでGlobalなスタイルを作る
styled-componentsはcreateGlobalStyleを使ってグローバルなスタイルを当てることができます。create-react-appなどでstyled-componentsを使っていた時は、index.jsに書くのが一般的ですが、Gatsbyにおける./src/pages/index.jsはあくまでもルートページを作るコンポーネントなので、ここにcreateGlobalStyleでグローバルなスタイルを当てたところで、他のページでは適用されません。
Gatsbyでは慣例的にページ間で共通するコンポーネントは./src/components/に入れることになっています(もちろん、慣例なのでパスさえ通っていれば別のディレクトリでも構いませんが、他人にコードを見せる時に説明が必要になるので、特に理由がなければこのパスに保存することをオススメします)。
さらに./src/components/layout.jsにページ間で共通するコンポーネント(例えば、Header, Navigation, Footerなど)をまとめて書くのが慣例です。グローバルなスタイルをlayout.js内で作っておけば、他のページコンポーネントでlayout.jsを呼び出すだけで、グローバルなスタイルを当てつつ、ページ間で共通するコンポーネントを配置することができます。
以下はほんの一例です。styled-resetというパッケージを使ってCSS Resetを適用しつつ、createGlobalStyleでグローバルなスタイルを当てています。ThemeProviderやグローバルなフォントの設定(GlobalFonts)などもこのlayout.jsに書いておくと、他のページに簡単にスタイルを適用できるのでオススメです!
import React from "react";
import { createGlobalStyle, ThemeProvider } from "styled-components";
import reset from "styled-reset";
import GlobalFonts from "../fonts/fonts";

// themeを定義
const theme = {
  backgroundColor: "#263238",
  primary: "#4fc3f7",
  primaryLight: "#E1F5FE",
  primaryDark: "#0288D1",
  secondary: "#f7844f",
};

const GlobalStyle = createGlobalStyle`
  ${reset}

  html,body,h1,h2,h3,h4,h5,h6,p {
    padding: 0;
    margin: 0;
  }

  html {
    font-size: 62.5%;
  }

  *,
  *::before,
  *::after {
    box-sizing: border-box;
  }

  body {
    font-family: Orbitron, Makinas4Square, sans-serif;
    background-color: ${(props) => props.theme.backgroundColor};
  }

  a:link,
  a:visited,
  a:hover,
  a:active {
    text-decoration: none;
  }

`;

function Layout({children}) {
  return (
    <React.Fragment>
      <ThemeProvider theme={theme}>
        <GlobalFonts />
        <GlobalStyle />
        {children}
      </ThemeProvider>
    </React.Fragment>
  );
}

export default Layout;
Gatsbyでstyled-components向けにstylelintを設定する
styled-componentsをLintするためのstylelintを設定します。まずはstyled-componentsの公式の手順にしたがって、インストールと設定を行います。
https://styled-components.com/docs/tooling#stylelint
以下のコマンドでstylelintでstyled-componentsをLintするのに必要なパッケージをインストールします。
npm install --save-dev \
  stylelint \
  stylelint-processor-styled-components \
  stylelint-config-styled-components \
  stylelint-config-recommended
プロジェクトのルートに.stylelintrc.jsを作成します。
// .stylelintrc.js
module.exports = {
  extends: [
    "stylelint-config-recommended",
    "stylelint-config-styled-components",
  ],
  processors: ["stylelint-processor-styled-components"],
}
さらにGatsby用のプラグインをインストールして、ビルド時にstyled-componentsをLintしてエラーが有ればコンソールで知らせてくれるようにします。
https://www.gatsbyjs.org/packages/gatsby-plugin-stylelint/
https://github.com/danbruegge/gatsby-plugin-stylelint
下のコマンドでプラグインをインストールします。
npm install @danbruegge/gatsby-plugin-stylelint stylelint --save-dev
npm i gatsby-plugin-stylelintとしないように注意してください。このパッケージは既にDeprecatedになっています。
gatsby-config.jsにプラグインを追加します。
plugins: ["@danbruegge/gatsby-plugin-stylelint"]
これで例えば以下のように空のスタイルを作成した時にbuild errorが出るようになります。
// ./src/components/layout.js
import React from "react"
import { createGlobalStyle } from "styled-components"
const GlobalStyle = createGlobalStyle`
  body {
  }
`
export default function Layout({ children }) {
  return (
    <React.Fragment>
      <GlobalStyle />
    </React.Fragment>
  )
}
src/components/layout.js
 5:8  ✖  Unexpected empty block   block-no-empty
VSCodeなどのEditor側でstylelintのエラーを出したい場合は以下のプラグインがオススメです。
https://marketplace.visualstudio.com/items?itemName=stylelint.vscode-stylelint
GatsbyでEmotionを使うための設定
まずはEmotionと gatsby-plugin-emotionをインストールします。
npm install --save gatsby-plugin-emotion @emotion/core @emotion/styled
gatsby-config.jsにプラグインを設定します。
module.exports = {
  plugins: [gatsby-plugin-emotion],
}
./src/pages/index.jsにEmotionをimportして、gatsby developを実行して設定に問題が無いか確認してください。
import React from "react"
import { Link } from "gatsby"
import styled from "@emotion/styled"
import { css, jsx } from "@emotion/core"
import Layout from "../components/layout"
import Image from "../components/image"
import SEO from "../components/seo"
const Button = styled.button`
padding: 4px 16px;
margin: 8px;
color: black;
background-color: lightgreen;
border-radius: 8px;
text-align: center;
`
const IndexPage = () => (
<Layout>
<SEO title="Home" />
<h1>Hi people</h1>
<p>Welcome to your new Gatsby site.</p>
<p>Now go build something great.</p>
<div style={{ maxWidth: 300px, marginBottom: 1.45rem }}>
<Image />
</div>
<div
css={{
display: "flex",
justifyContent: "center",
}}
>
<Button>hoge</Button>
<Button
css={css`
color: red;
font-weight: bold;
`}
>
piyo
</Button>
</div>
<Link to="/page-2/">Go to page 2</Link> <br />
<Link to="/using-typescript/">Go to "Using TypeScript"</Link>
</Layout>
)
export default IndexPage
下のようなボタンが表示されれば成功です。
GatsbyのEmotionでGlobalなスタイルを設定する
styled-componentsと同様、EmotionのGlobalなスタイルも layout.jsに設定します。
import React from "react"
import PropTypes from "prop-types"
import { useStaticQuery, graphql } from "gatsby"

import { Global, css } from "@emotion/core"

import Header from "./header"
import "./layout.css"

const Layout = ({ children }) => {
  const data = useStaticQuery(graphql`
    query SiteTitleQuery {
      site {
        siteMetadata {
          title
        }
      }
    }
  `)

  return (
    <>
      <Global
        styles={css`
          body {
            margin: 0;
          }
        `}
      />
      <Header siteTitle={data.site.siteMetadata.title} />
      <div
        style={{
          margin: 0 auto,
          maxWidth: 960,
          padding: 0 1.0875rem 1.45rem,
        }}
      >
        <main>{children}</main>
        <footer>
          © {new Date().getFullYear()}, Built with
          { }
          <a href="https://www.gatsbyjs.org">Gatsby</a>
        </footer>
      </div>
    </>
  )
}

Layout.propTypes = {
  children: PropTypes.node.isRequired,
}

export default Layout
GatsbyでEmotion向けにESLintを設定する。
https://github.com/emotion-js/emotion/tree/master/packages/eslint-plugin-emotion
Gatsby向けのESLintの設定だけでは、Emotionの import { jsx } from "@emotion/core"のようなimportに対して、 warning 'jsx' is defined but never usedのようにWarningが出てしまいます。
そこで、eslint-plugin-emotionを使用します。このプラグインを使用するとjsxに対するwarningが消える上に、万が一jsxをimportし忘れたままファイルを保存してしまっても、Linterで警告しつつ、自動的に import { jsx } from "@emotion/core"をファイルに挿入してくれます。
下のコマンドでをインストールします。
npm install eslint-plugin-emotion --save-dev
さらに .eslintrc.jsにpluginsとrulesを追加します。
    rules: {
    "emotion/jsx-import": "error",
    "emotion/no-vanilla": "error",
    "emotion/import-from-emotion": "error",
    "emotion/styled-import": "error",
  },

    plugins: ["emotion"],
GatsbyでEmotion向けにstylelintを設定する
stylelintはまだEmotionに対応できていないため、styled-componentsでの設定を流用します。幸い、2つのCSS-in-JSの記法はほぼ同じなので、多くの場合、問題なく動作します。詳しくはIssueをご覧ください。
まずはstyled-componentsのstylelint関連のパッケージをインストールします。
npm install --save-dev \
  stylelint \
  stylelint-processor-styled-components \
  stylelint-config-styled-components \
  stylelint-config-recommended
.stylelintrc.jsを作成します。
// .stylelintrc.js
module.exports = {
  extends: [
    "stylelint-config-recommended",
    "stylelint-config-styled-components",
  ],
  processors: ["stylelint-processor-styled-components"],
}
Gatsbyのプラグインをインストールして、ビルド時にエラーを出してくれるようにします。
npm install @danbruegge/gatsby-plugin-stylelint stylelint --save-dev
gatsby-config.jsに設定を書きます。
plugins: ["@danbruegge/gatsby-plugin-stylelint"]
https://github.com/emotion-js/emotion/issues/686
https://github.com/gatsbyjs/gatsby/issues/13861
stylelintではなく、postcss-jsxを使うという方法もあります。ただ、こちらのリポジトリは2019/12/30から活動が止まっているため、あまりオススメできません。
https://github.com/gucong3000/postcss-jsx
https://qiita.com/otofu-square/items/3861df1ab11860b6a4d6
Gatsby & Emotion & tailwind環境を作る
https://github.com/ben-rogerson/twin.macro
twin.macroを利用して、GatsbyのEmotionでtailwindを使うための環境構築をします。まずはtwin.macroをインストールします。このインストールでtailwindcssパッケージも自動でインストールされます。
npm install --save twin.macro
gatsby-browser.jsでtailwindのCSSをimportします。
// gatsby-browser.js
import 'tailwindcss/dist/base.min.css'
gatsby-config.jsにgatsby-plugin-emotionを追加します。これまでの設定で行っている場合は不要です。
plugins: [gatsby-plugin-emotion],
試しに./src/pages/index.jsに以下のコードを追加して、gatsby developしてください。
 import "twin.macro"

// ...
   <div tw="container flex justify-center">
      <button tw="bg-green-400 rounded py-2 px-4">tailwind</button>
    </div>
下のようなボタンが表示されれば成功です。
tailwindの設定をするには、まずプロジェクトのルートで下のコマンドを実行します。
npx tailwindcss init
これで下のような空のtailwind.config.jsが作成されました。
module.exports = {
  purge: [],
  theme: {
    extend: {},
  },
  variants: {},
  plugins: [],
}
さらにpackage.jsonにbabel macroの設定を追加します。
  "babelMacros": {
    "twin": {
      "config": "./tailwind.config.js",
      "preset": "emotion",
      "hasSuggestions": true,
      "debug": false
    }
  }
"hasSuggestions": true,にしておくと、間違ったクラスを指定した時に、もしかして...のように教えてくれるのでオススメです。
✕ transparent was not found

Try one of these classes:
transform / transition-... / translate-x-...
translate-y-... / whitespace-pre-wrap / content-start
更に詳しい使い方は以下の記事にまとめました。
https://gladevise.com/gatsby-emotion-tailwind-setup/
Gatsby starterを使って構築する
こんなまどろっこしいことやってられるか! という方のためにいくつかstarterプロジェクトを作りました。急いでいる方はこちらからプロジェクトを作ってください。
styled-components & ESLint & Prettier & stylelint環境のstarter
https://github.com/tombo-gokuraku/gatsby-starter-styled-components-eslint-prettier-stylelint
stylingにstyled-componentsを使用して、ESLint, Prettier, stylelintでLintとFormatをかけるプロジェクトです。以下のようにしてプロジェクトを作れます。
gatsby new hoge_project https://github.com/tombo-gokuraku/gatsby-starter-styled-components-eslint-prettier-stylelint
Emotion & ESLint & Prettier & stylelint環境のstarter
https://github.com/tombo-gokuraku/gatsby-starter-emotion-eslint-prettier-stylelint
stylingにEmotionを使用して、ESLint, Prettier, stylelintでLintとFormatをかけるプロジェクトです。以下のようにしてプロジェクトを作れます。
gatsby new gatsby_emotion_test https://github.com/tombo-gokuraku/gatsby-starter-emotion-eslint-prettier-stylelint
Emotion & tailwind & ESLint & Prettier & stylelint環境のstarter
https://github.com/tombo-gokuraku/gatsby-starter-emotion-tailwind
Emotionとtailwindでスタイリングして、ESLint, Prettier, stylelintでLintとFormatをかけるプロジェクトです。以下のようにしてプロジェクトを作れます。
gatsby new emotion_tailwind https://github.com/tombo-gokuraku/gatsby-starter-emotion-tailwind